Welcome to parsedmarc’s documentation!


parsedmarc is a Python module and CLI utility for parsing DMARC reports.
Features
- Parses draft and 1.0 standard aggregate reports
- Parses forensic reports
- Can parse reports from an inbox over IMAP
- Transparently handles gzip or zip compressed reports
- Consistent data structures
- Simple JSON and/or CSV output
- Optionally email the results
- Optionally send the results to Elasticsearch, for use with premade Kibana dashboards
CLI help
usage: parsedmarc [-h] [-o OUTPUT] [-n NAMESERVERS [NAMESERVERS ...]]
              [-t TIMEOUT] [-H HOST] [-u USER] [-p PASSWORD]
              [-r REPORTS_FOLDER] [-a ARCHIVE_FOLDER] [-d]
              [-E [ELASTICSEARCH_HOST [ELASTICSEARCH_HOST ...]]]
              [--save-aggregate] [--save-forensic] [-O OUTGOING_HOST]
              [-U OUTGOING_USER] [-P OUTGOING_PASSWORD] [-F OUTGOING_FROM]
              [-T OUTGOING_TO [OUTGOING_TO ...]] [-S OUTGOING_SUBJECT]
              [-A OUTGOING_ATTACHMENT] [-M OUTGOING_MESSAGE] [-w] [--test]
              [-s] [--debug] [-v]
              [file_path [file_path ...]]

Parses DMARC reports

positional arguments:
  file_path             one or more paths to aggregate or forensic report
                        files or emails

optional arguments:
  -h, --help            show this help message and exit
  -o OUTPUT, --output OUTPUT
                        Write output files to the given directory
  -n NAMESERVERS [NAMESERVERS ...], --nameservers NAMESERVERS [NAMESERVERS ...]
                        nameservers to query ((Default is Cloudflare's))
  -t TIMEOUT, --timeout TIMEOUT
                        number of seconds to wait for an answer from DNS
                        (default 6.0)
  -H HOST, --host HOST  IMAP hostname or IP address
  -u USER, --user USER  IMAP user
  -p PASSWORD, --password PASSWORD
                        IMAP password
  -r REPORTS_FOLDER, --reports-folder REPORTS_FOLDER
                        The IMAP folder containing the reports Default: INBOX
  -a ARCHIVE_FOLDER, --archive-folder ARCHIVE_FOLDER
                        Specifies the IMAP folder to move messages to after
                        processing them Default: Archive
  -d, --delete          Delete the reports after processing them
  -E [ELASTICSEARCH_HOST [ELASTICSEARCH_HOST ...]], --elasticsearch-host [ELASTICSEARCH_HOST [ELASTICSEARCH_HOST ...]]
                        A list of one or more Elasticsearch hostnames or URLs
                        to use (Default localhost:9200)
  --save-aggregate      Save aggregate reports to Elasticsearch
  --save-forensic       Save forensic reports to Elasticsearch
  -O OUTGOING_HOST, --outgoing-host OUTGOING_HOST
                        Email the results using this host
  -U OUTGOING_USER, --outgoing-user OUTGOING_USER
                        Email the results using this user
  -P OUTGOING_PASSWORD, --outgoing-password OUTGOING_PASSWORD
                        Email the results using this password
  -F OUTGOING_FROM, --outgoing-from OUTGOING_FROM
                        Email the results using this from address
  -T OUTGOING_TO [OUTGOING_TO ...], --outgoing-to OUTGOING_TO [OUTGOING_TO ...]
                        Email the results to these addresses
  -S OUTGOING_SUBJECT, --outgoing-subject OUTGOING_SUBJECT
                        Email the results using this subject
  -A OUTGOING_ATTACHMENT, --outgoing-attachment OUTGOING_ATTACHMENT
                        Email the results using this filename
  -M OUTGOING_MESSAGE, --outgoing-message OUTGOING_MESSAGE
                        Email the results using this message
  -w, --watch           Use an IMAP IDLE connection to process reports as they
                        arrive in the inbox
  --test                Do not move or delete IMAP messages
  -s, --silent          Only print errors
  --debug               Print debugging information
  -v, --version         show program's version number and exit
SPF and DMARC record validation
If you are looking for SPF and DMARC record validation and parsing, check out the sister project, checkdmarc.
Sample aggregate report output
Here are the results from parsing the example report from the dmarc.org wiki. It’s actually an older draft of the the 1.0 report schema standardized in RFC 7480 Appendix C. This draft schema is still in wide use.
parsedmarc produces consistent, normalized output, regardless of the report
schema.
JSON
{
  "xml_schema": "draft",
  "report_metadata": {
    "org_name": "acme.com",
    "org_email": "noreply-dmarc-support@acme.com",
    "org_extra_contact_info": "http://acme.com/dmarc/support",
    "report_id": "9391651994964116463",
    "begin_date": "2012-04-27 20:00:00",
    "end_date": "2012-04-28 19:59:59",
    "errors": []
  },
  "policy_published": {
    "domain": "example.com",
    "adkim": "r",
    "aspf": "r",
    "p": "none",
    "sp": "none",
    "pct": "100",
    "fo": "0"
  },
  "records": [
    {
      "source": {
        "ip_address": "72.150.241.94",
        "country": "US",
        "reverse_dns": "adsl-72-150-241-94.shv.bellsouth.net",
        "base_domain": "bellsouth.net"
      },
      "count": 2,
      "policy_evaluated": {
        "disposition": "none",
        "dkim": "fail",
        "spf": "pass",
        "policy_override_reasons": []
      },
      "identifiers": {
        "header_from": "example.com",
        "envelope_from": "example.com",
        "envelope_to": null
      },
      "auth_results": {
        "dkim": [
          {
            "domain": "example.com",
            "selector": "none",
            "result": "fail"
          }
        ],
        "spf": [
          {
            "domain": "example.com",
            "scope": "mfrom",
            "result": "pass"
          }
        ]
      }
    }
  ]
}
CSV
xml_schema,org_name,org_email,org_extra_contact_info,report_id,begin_date,end_date,errors,domain,adkim,aspf,p,sp,pct,fo,source_ip_address,source_country,source_reverse_dns,source_base_domain,count,disposition,dkim_alignment,spf_alignment,policy_override_reasons,policy_override_comments,envelope_from,header_from,envelope_to,dkim_domains,dkim_selectors,dkim_results,spf_domains,spf_scopes,spf_results
draft,acme.com,noreply-dmarc-support@acme.com,http://acme.com/dmarc/support,9391651994964116463,2012-04-27 20:00:00,2012-04-28 19:59:59,,example.com,r,r,none,none,100,0,72.150.241.94,US,adsl-72-150-241-94.shv.bellsouth.net,bellsouth.net,2,none,fail,pass,,,example.com,example.com,,example.com,none,fail,example.com,mfrom,pass
Sample forensic report output
I don’t have a sample I can share for privacy reasons. If you have a sample forensic report that you can share publicly, please contact me!
Bug reports
Please report bugs on the GitHub issue tracker
Installation
parsedmarc works with Python 3 only.
On Debian or Ubuntu systems, run:
$ sudo apt-get install python3-pip
Python 3 installers for Windows and macOS can be found at https://www.python.org/downloads/
To install or upgrade to the latest stable release of parsedmarc on
macOS or Linux, run
$ sudo -H pip3 install -U parsedmarc
Or, install the latest development release directly from GitHub:
$ sudo -H pip3 install -U git+https://github.com/domainaware/parsedmarc.git
Note
On Windows, pip3 is pip, even with Python 3. So on Windows, simply
substitute pip as an administrator in place of sudo pip3, in the
above commands.
Optional dependencies
If you would like to be able to parse emails saved from Microsoft Outlook
(i.e. OLE .msg files), install msgconvert:
On Debian or Ubuntu systems, run:
$ sudo apt-get install libemail-outlook-message-perl
Elasticsearch and Kibana
To set up visual dashboards of DMARC data, install Elasticsearch and Kibana.
sudo apt-get install -y openjdk-8-jre apt-transport-https
wget -qO - https://artifacts.elastic.co/GPG-KEY-elasticsearch | sudo apt-key add -
echo "deb https://artifacts.elastic.co/packages/6.x/apt stable main" | sudo tee -a /etc/apt/sources.list.d/elastic-6.x.list
sudo apt-get update
sudo apt-get install -y elasticsearch kibana
sudo systemctl daemon-reload
sudo systemctl enable elasticsearch.service
sudo systemctl enable kibana.service
sudo service start elasticsearch
sudo service start kibana
Without the commercial X-Pack, Kibana does not have any authentication mechanism of its own. You can use nginx as a reverse proxy that provides basic authentication.
sudo apt-get install -y nginx apache2-utils
Create a directory to store the certificates and keys:
mkdir ~/ssl
cd ~/ssl
To create a self-signed certificate, run:
openssl req -x509 -nodes -days 365 -newkey rsa:4096 -keyout kibana.key -out kibana.crt
Or, to create a Certificate Signing Request (CSR) for a CA, run:
openssl req -newkey rsa:4096-nodes -keyout kibana.key -out kibana.csr
Fill in the prompts. Watch out for Common Name (e.g. server FQDN or YOUR domain name), which is the IP address or domain name that you will be hosting Kibana on. it is the most important field.
If you generated a CSR, remove the CSR after you have your certs
rm -f kibana.csr
Move the keys into place and secure them:
cd
sudo mv ssl /etc/nginx
sudo chown -R root:www-data /etc/nginx/ssl
sudo chmod -R u=rX,g=rX,o= /etc/nginx/ssl
Disable the default nginx configuration:
sudo rm /etc/nginx/sites-enabled/default
Create the web server configuration
sudo nano /etc/nginx/sites-available/kibana
server {
    listen 443 ssl http2;
    ssl_certificate /etc/nginx/ssl/kibana.crt;
    ssl_certificate_key /etc/nginx/ssl/kibana.key;
    ssl_dhparam /etc/nginx/ssl/dhparam.pem;
    ssl_session_timeout 1d;
    ssl_session_cache shared:SSL:50m;
    ssl_session_tickets off;

    ssl_protocols TLSv1.2;
    ssl_ciphers 'ECDHE-ECDSA-AES256-GCM-SHA384:ECDHE-RSA-AES256-GCM-SHA384:ECDHE-ECDSA-CHACHA20-POLY1305:ECDHE-RSA-CHAC   ssl_prefer_server_ciphers on;

    # Uncomment this next line if you are using a signed, trusted cert
    #add_header Strict-Transport-Security "max-age=63072000; includeSubdomains; preload";
    add_header X-Frame-Options SAMEORIGIN;
    add_header X-Content-Type-Options nosniff;
    auth_basic "Login required";
    auth_basic_user_file /etc/nginx/htpasswd;

    location / {
        proxy_pass http://127.0.0.1:5601;
        proxy_set_header Host $host;
        proxy_set_header X-Real-IP $remote_addr;
        proxy_set_header X-Forwarded-For $proxy_add_x_forwarded_for;
    }
}

server {
    listen 80;
    return 301 https://$server_name$request_uri;
}
Enable the nginx configuration for Kibana:
sudo ln -s /etc/nginx/sites-available/kibana /etc/nginx/sites-enabled/kibana
Add a user to basic authentication:
sudo htpasswd -c /etc/nginx/htpasswd exampleuser
Where exampleuser is the name of the user you want to add.
Secure the permissions of the httpasswd file:
sudo chown root:www-data /etc/nginx/htpasswd
sudo chmod u=rw,g=r,o= /etc/nginx/htpasswd
Restart nginx:
sudo service nginx restart
Now that Elasticsearch is up and running, use parsedmarc to send data to
it.
Om the same system as Elasticsearch, pass --save-aggregate and/or
--save-forensic to parsedmarc save the results in Elasticsearch.
Warning
--save-aggregate and --save-forensic are separate options because
you may not want to save forensic reports to your Elasticsearch instance,
particularly if you are in a highly-regulated industry that handles
sensitive data, such as healthcare or finance. If your legitimate outgoing
email fails DMARC, it is possible that email may appear later in a
forensic report.
Forensic reports contain the original headers of an email that failed a DMARC check, and sometimes may also include the full message body, depending on the policy of the reporting organisation.
Most reporting organisations do not send forensic reports of any kind for privacy reasons. While aggregate DMARC reports are sent at least daily, it is normal to receive very few forensic reports.
When you first visit Kibana, it will prompt you to create an index pattern.
Start by creating the index pattern dmarc_aggregate (without an *),
and select date_range as the time field. Once the dmarc_aggregate
index pattern dmarc_aggregate has been saved, create a dmarc_forensic
index pattern, with arrival_date as the time field.


Once the index patterns have been created, you can import the dashboards.
Download (right click the link and click save as) kibana_saved_objects.json.
Import kibana_saved_objects.json the Saved Objects tab of the management
page of Kibana.
It will give you the option to overwrite existing saved dashboards or visualizations, which could be used to restore them if you or someone else breaks them, as there are no permissions/access controls in Kibana without the commercial X-Pack.
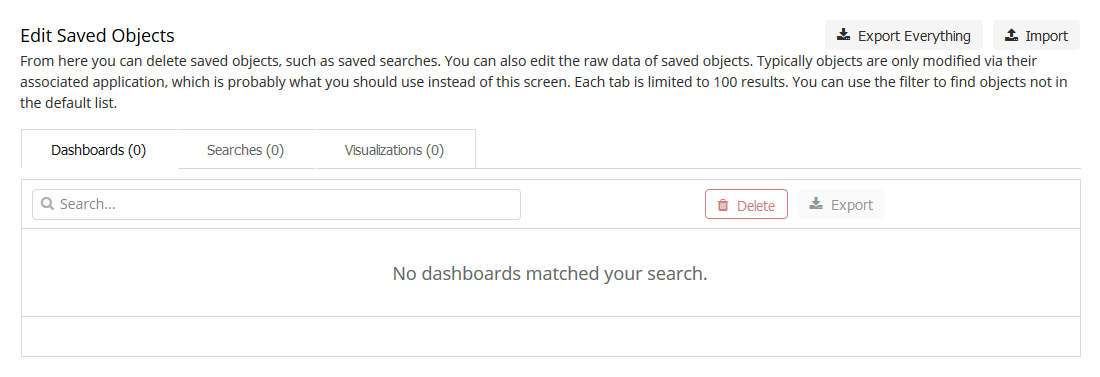

Kibana will then ask you to match the newly imported objects to your index
patterns. Select dmarc_forensic for the set of forensic objects, and
select dmarc_aggregate for the other saved objects, as shown below.

Running parsedmarc as a systemd service
Use systemd to run parsedmarc as a service and process reports as they
arrive.
Create the service configuration file
sudo nano /etc/systemd/system/parsedmarc.service
Edit the command line options of parsedmarc in the service’s ExecStart
setting to suit your needs.
Note
Always pass the --watch option to parsedmarc when running it as a
service. Use --silent to only log errors.
[Unit]
Description=parsedmarc mailbox watcher
Documentation=https://domainaware.github.io/parsedmarc/

[Service]
ExecStart=/usr/local/bin/parsedmarc --watch --silent --save-aggregate --save-forensic -H "outlook.office365.com" -u "dmarc@example.com" -p "FooBar!"
Restart=always
RestartSec=5m

[Install]
WantedBy=multi-user.target
Then, enable the service
sudo systemctl daemon-reload
sudo systemctl enable parsedmarc.service
sudo service parsedmarc restart
Note
You must also run the above commands whenever you edit
parsedmarc.service.
API
A Python package for parsing DMARC reports
-
exception
parsedmarc.InvalidAggregateReport[source]¶ Raised when an invalid DMARC aggregate report is encountered
-
exception
parsedmarc.InvalidForensicReport[source]¶ Raised when an invalid DMARC forensic report is encountered
-
parsedmarc.email_results(results, host, mail_from, mail_to, port=0, starttls=True, use_ssl=False, user=None, password=None, subject=None, attachment_filename=None, message=None, ssl_context=None)[source]¶ Emails parsing results as a zip file
Parameters: - results (OrderedDict) – Parsing results
- host – Mail server hostname or IP address
- mail_from – The value of the message from header
- mail_to – A list of addresses to mail to
- port (int) – Port to use
- starttls (bool) – use STARTTLS
- use_ssl (bool) – Require a SSL connection from the start
- user – An optional username
- password – An optional password
- subject – Overrides the default message subject
- attachment_filename – Override the default attachment filename
- message – Override the default plain text body
- ssl_context – SSL context options
-
parsedmarc.extract_xml(input_)[source]¶ Extracts xml from a zip or gzip file at the given path, file-like object, or bytes.
Parameters: input – A path to a file, a file like object, or bytes Returns: The extracted XML Return type: str
-
parsedmarc.get_dmarc_reports_from_inbox(host, user, password, reports_folder='INBOX', archive_folder='Archive', delete=False, test=False, nameservers=None, dns_timeout=6.0)[source]¶ Fetches and parses DMARC reports from sn inbox
Parameters: - host – The mail server hostname or IP address
- user – The mail server user
- password – The mail server password
- reports_folder – The IMAP folder where reports can be found
- archive_folder – The folder to move processed mail to
- delete (bool) – Delete messages after processing them
- test (bool) – Do not move or delete messages after processing them
- nameservers (list) – A list of DNS nameservers to query
- dns_timeout (float) – Set the DNS query timeout
Returns: Lists of
aggregate_reportsandforensic_reportsReturn type: OrderedDict
-
parsedmarc.get_report_zip(results)[source]¶ Creates a zip file of parsed report output
Parameters: results (OrderedDict) – The parsed results Returns: zip file bytes Return type: bytes
-
parsedmarc.human_timestamp_to_datetime(human_timestamp)[source]¶ Converts a human-readable timestamp into a Python
DateTimeobjectParameters: human_timestamp (str) – A timestamp in YYYY-MM-DD HH:MM:SS` format Returns: The converted timestamp Return type: DateTime
-
parsedmarc.parse_aggregate_report_file(_input, nameservers=None, timeout=6.0)[source]¶ Parses a file at the given path, a file-like object. or bytes as a aggregate DMARC report
Parameters: - _input – A path to a file, a file like object, or bytes
- nameservers (list) – A list of one or more nameservers to use
- public DNS resolvers by default) ((Cloudflare's) –
- timeout (float) – Sets the DNS timeout in seconds
Returns: The parsed DMARC aggregate report
Return type: OrderedDict
-
parsedmarc.parse_aggregate_report_xml(xml, nameservers=None, timeout=6.0)[source]¶ Parses a DMARC XML report string and returns a consistent OrderedDict
Parameters: - xml (str) – A string of DMARC aggregate report XML
- nameservers (list) – A list of one or more nameservers to use
- public DNS resolvers by default) ((Cloudflare's) –
- timeout (float) – Sets the DNS timeout in seconds
Returns: The parsed aggregate DMARC report
Return type: OrderedDict
-
parsedmarc.parse_forensic_report(feedback_report, sample, sample_headers_only, nameservers=None, timeout=6.0)[source]¶ Converts a DMARC forensic report and sample to a
OrderedDictParameters: - feedback_report (str) – A message’s feedback report as a string
- sample (str) – The RFC 822 headers or RFC 822 message sample
- sample_headers_only (bool) – Set true if the sample is only headers
- nameservers (list) – A list of one or more nameservers to use
- public DNS resolvers by default) ((Cloudflare's) –
- timeout (float) – Sets the DNS timeout in seconds
Returns: An parsed report and sample
Return type: OrderedDict
-
parsedmarc.parse_report_email(input_, nameservers=None, timeout=6.0)[source]¶ Parses a DMARC report from an email
Parameters: - input – An emailed DMARC report in RFC 822 format, as bytes or a string
- nameservers (list) – A list of one or more nameservers to use
- timeout (float) – Sets the DNS timeout in seconds
Returns: report_type:aggregateorforensicreport: The parsed report
Return type: OrderedDict
-
parsedmarc.parse_report_file(input_, nameservers=None, timeout=6.0)[source]¶ Parses a DMARC aggregate or forensic file at the given path, a file-like object. or bytes
Parameters: - input – A path to a file, a file like object, or bytes
- nameservers (list) – A list of one or more nameservers to use
- public DNS resolvers by default) ((Cloudflare's) –
- timeout (float) – Sets the DNS timeout in seconds
Returns: The parsed DMARC report
Return type: OrderedDict
-
parsedmarc.parsed_aggregate_reports_to_csv(reports)[source]¶ Converts one or more parsed aggregate reports to flat CSV format, including headers
Parameters: reports – A parsed aggregate report or list of parsed aggregate reports Returns: Parsed aggregate report data in flat CSV format, including headers Return type: str
-
parsedmarc.parsed_forensic_reports_to_csv(reports)[source]¶ Converts one or more parsed forensic reports to flat CSV format, including headers
Parameters: reports – A parsed forensic report or list of parsed forensic reports Returns: Parsed forensic report data in flat CSV format, including headers Return type: str
-
parsedmarc.save_output(results, output_directory='output')[source]¶ Save report data in the given directory
Parameters: - results (OrderedDict) – Parsing results
- output_directory – The patch to the directory to save in
-
parsedmarc.watch_inbox(host, username, password, callback, reports_folder='INBOX', archive_folder='Archive', delete=False, test=False, wait=30, nameservers=None, dns_timeout=6.0)[source]¶ Use an IDLE IMAP connection to parse incoming emails, and pass the results to a callback function
Parameters: - host – The mail server hostname or IP address
- username – The mail server username
- password – The mail server password
- callback – The callback function to receive the parsing results
- reports_folder – The IMAP folder where reports can be found
- archive_folder – The folder to move processed mail to
- delete (bool) – Delete messages after processing them
- test (bool) – Do not move or delete messages after processing them
- wait (int) – Number of seconds to wait for a IMAP IDLE response
- nameservers (list) – A list of one or more nameservers to use
- public DNS resolvers by default) ((Cloudflare's) –
- dns_timeout (float) – Set the DNS query timeout
parsedmarc.elastic
-
exception
parsedmarc.elastic.AlreadySaved[source]¶ Raised when a report to be saved matches an existing report
-
parsedmarc.elastic.save_aggregate_report_to_elasticsearch(aggregate_report)[source]¶ Saves a parsed DMARC aggregate report to ElasticSearch
Parameters: aggregate_report (OrderedDict) – A parsed forensic report Raises: AlreadySaved
-
parsedmarc.elastic.save_forensic_report_to_elasticsearch(forensic_report)[source]¶ Saves a parsed DMARC forensic report to ElasticSearch
Parameters: forensic_report (OrderedDict) – A parsed forensic report Raises: AlreadySaved
-
parsedmarc.elastic.set_hosts(hosts)[source]¶ Sets the Elasticsearch hosts to use
Parameters: hosts – A single hostname or URL, or list of hostnames or URLs